Having moved my gaming pc back to Windows (yes I know…) due to a big upgrade
in processor and graphics card (9800X3D and RTX 5080) I have been setting up a
stats screen using AIDA64. One area that was lacking however was the ability for
me to pull in MQTT data and display it on the sensor panel. Time to fire up
Visual Studio.
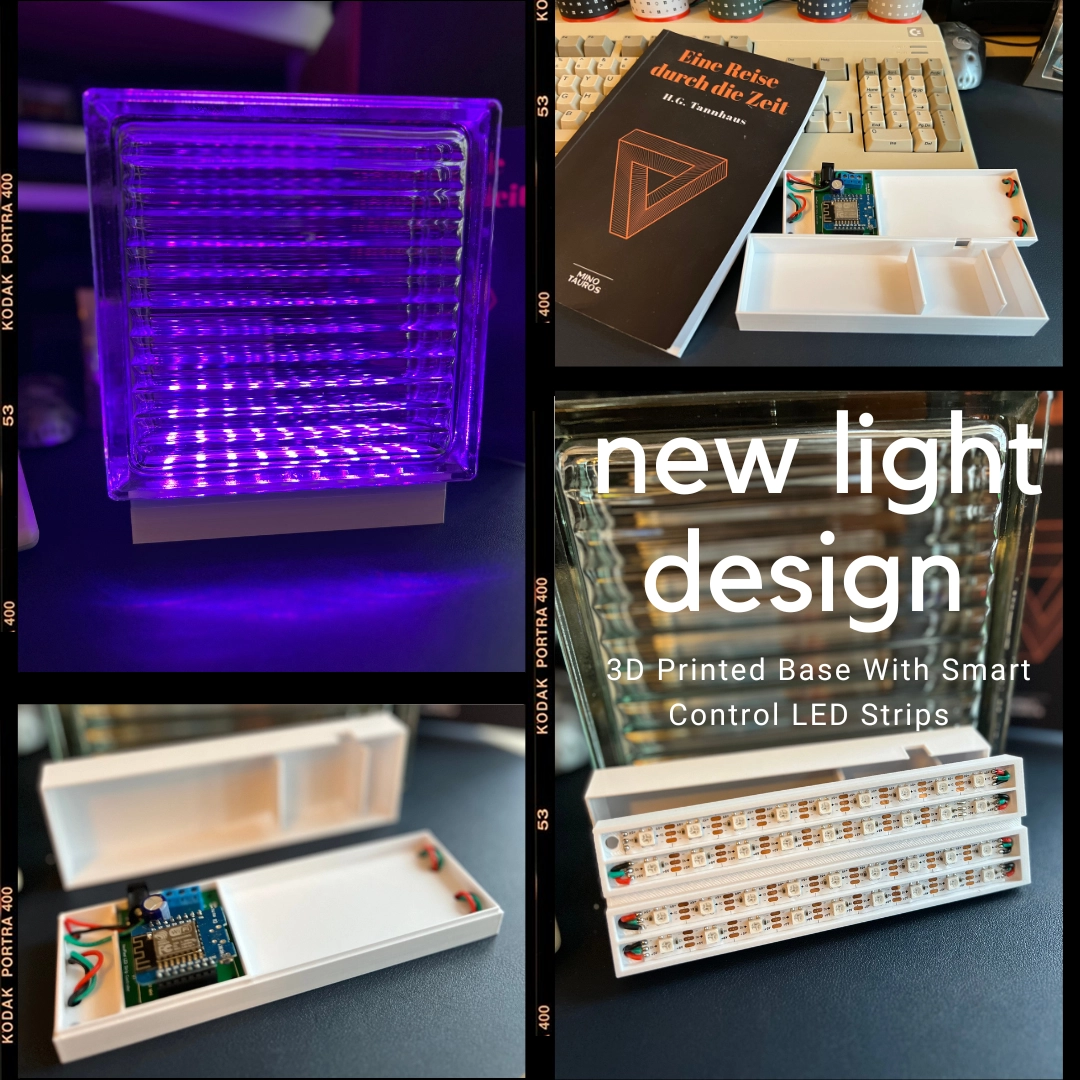
When I was idly browsing Instagram I came across an advert for (in my opinion)
an incredibly expensive (€139) glass brick light. I can’t find the original
advert but I believe
this article
shows the light from the same company.
The light used manual filters to change the colour, was not smart and I think
was a lot for what is mainly one glass brick. I thought I could do better and
for a lot cheaper, so I did.
Building a NeoPixel LED Controller with MQTT and HomeKit support. Expanding on
my previous project to add LED lighting to my work area, I wanted to investigate
a lower voltage and more customisable LED system. I had read about WS2812B or
NeoPixel LEDs but had not built anything with them.
I have a work area that I wanted to provide some additional lighting for, and
like everything else in my home I wanted it to work with Apple HomeKit. I did
not want to spend a large amount of money buying something like a Phillips Hue
Strip so I thought I would build my own. This will be a short guide to how I
built a HomeKit Enabled WiFi LED Strip and the software I wrote to run it.