Rebuilding my 2008 Mac Pro Desktop
Rebuilding my 2008 Mac Pro, it’s almost 10 years old and has languished for the last year hidden behind boxes, under powered and forgotten, it was time it had an upgrade and I fixed some of the destructive maintenance that had been done to it over the years.
But first a quick history of how and why I ended up purchasing this Mac back in 2008 (If you wish to skip to the rebuild, click here).
Switching from PC
After years of tinkering around PCs and having dipped my toe into Mac ownership via a selection of second-hand Pre G3 Power Macs (that ultimately ran plan9 in some strange cluster experiment) and then later a old G4 Power Mac. In 2006 I started my journey into switching from being a PC user to a Mac user and between then and 2008 I had several Macs in short succession.
First came a Early 2006 Mac Mini, a revolution for me as this was my first new, modern Mac and was not clunky, slow and second-hand, it reinforced my move from PC to Mac and I would not flip back for many years (lack of modern pro desktop did it in the end with hackintoshes bridging the gap till now).
Not long after the Mac Mini purchase I was itching for a more powerful Mac and just before Christmas I sold on the Mini and placed an order for a 20" Late Core 2 Duo iMac, this and the subsequent refurbished Late 2006 MacBook that got lugged back an forth to work each day are still going strong, (the MacBook lacks a suitable battery but that is another future refurb job) and provided me with a brilliant ecosystem to work from. However I felt like they both lacked the professional and expandable setup I had been used to with home built PCs. It was time to spend the cash and move into the Mac Pro arena.
My First Professional Mac
In 2008 I finally bit the bullet and bought my first Mac that I truly considered a comparable and professional replacement to the home built computers I had used in the past. I scraped together enough to buy a single processor Early 2008 Mac Pro I could not quite afford to get the dual processor version (something I would regret and considered fixing with the rebuild) but did find the extra cash to add a third party ram upgrade to install a whopping 6 gigabytes.
For many years it was an excellent workstation but after several upgrades that kept it ticking over (new graphics card, SSD upgrade) it had reached a point where I felt that I could no longer use it as my day to day machine. This coupled with a pig headed decision on Apples part to abandon the Pro range for many years (leaving the Pro Mac user in the doldrums) I never ended up in a situation where I felt it was worth my money to buy a new replacement.
I begrudgingly moved back to the PC, the Mac Pro plodded on, repurposed as a server and occasional Mac specific software platform. It ended its life not even running MacOS but running Ubuntu as a XBMC media server / client and then got stored behind boxes in my basement after a house move.
I continued to use PCs but did make the shift (by a luck of hardware) to running a dual boot Hackingtosh (using tricks to install MacOS on a PC rather than a Mac) allowing me to enjoy the benefits of a Mac ecosystem without having to purchase a new Pro (they thankfully did release a new range, but have once again abandoned it, in all but name).
About a year ago I move back fully to a Mac, this time with my needs being significantly different I no longer require a desktop workstation and have found that the new Pro range of MacBooks are excellent. I am now rocking a MacBook Pro “Core i7″ 2.9 15” Touch/Late 2016 a beast of a laptop that more than fulfils my requirements and has scope for expansion via the Thunderbolt 3 ports (graphics cards, SSD drives and the like).
After this lengthy digression I best talk about the rebuild.
Rebuilding my 2008 Mac Pro
First thing to note, I took no pictures whilst cleaning and upgrading the Mac which in hindsight was stupid, all of the pictures are post resurrection, apologies for this.
The initial boot of the the Mac was exceptionally slow and to my surprise it was still running MacOS, I had been sure I had left it with Linux installed. The speed of the bootup and how excruciating long it took to give me a responsive and usable environment made me suspect that the hard drive was on the way out or there were other serious issues with the Mac (dead ram or SATA controller problems).
I managed to limp it to the About This Mac summary and confirm that all of the ram chips were working, it was running El Capitan and that there were no obvious hardware problems (other than how slow it was), it reported a functional SuperDrive so that should work for a reinstall, assuming the hard drive is the only problem.
The first step was to open the case and swap the drive out ready for a reinstall. I was greeted by dust, lots and lots of dust, this is the result of not remembering how many years ago you opened the case and actually cleaned it. Clean your computers people, they will thank you for it. I also forgot how damn heavy the case is, luging up stairs and outside for a clean was a pain.
A quick once over with the air duster cleaned most of the crap out (I dismantled the fan assemblies later and deep cleaned them along with the optical drive bay and rear fans) and it was ready for the drive swap.
Rebuilding my 2008 Mac Pro – Things you forget, things that are broken and stupid decisions
Removing the hard drive caddies reminded me of some seriously short sighted decisions I made years ago when I was lazy, stupid and wanted to fit an SSD drive to the mac.
In my haste and clearly not wanting to buy a proper caddy converter to change a 3.5 to a 2.5 drive (you could not use the standard drive bay adapters it required a full bay converter like an Ice Dock or similar) I had decided to (grimace) cut the SATA and power loom and reroute it to the gap behind the optical drives. So now there was a partially usable loom and cables strewn about and looking really quite awful, there was also missing mounting screws, resulting in only two of the four hard drive bays being usable.
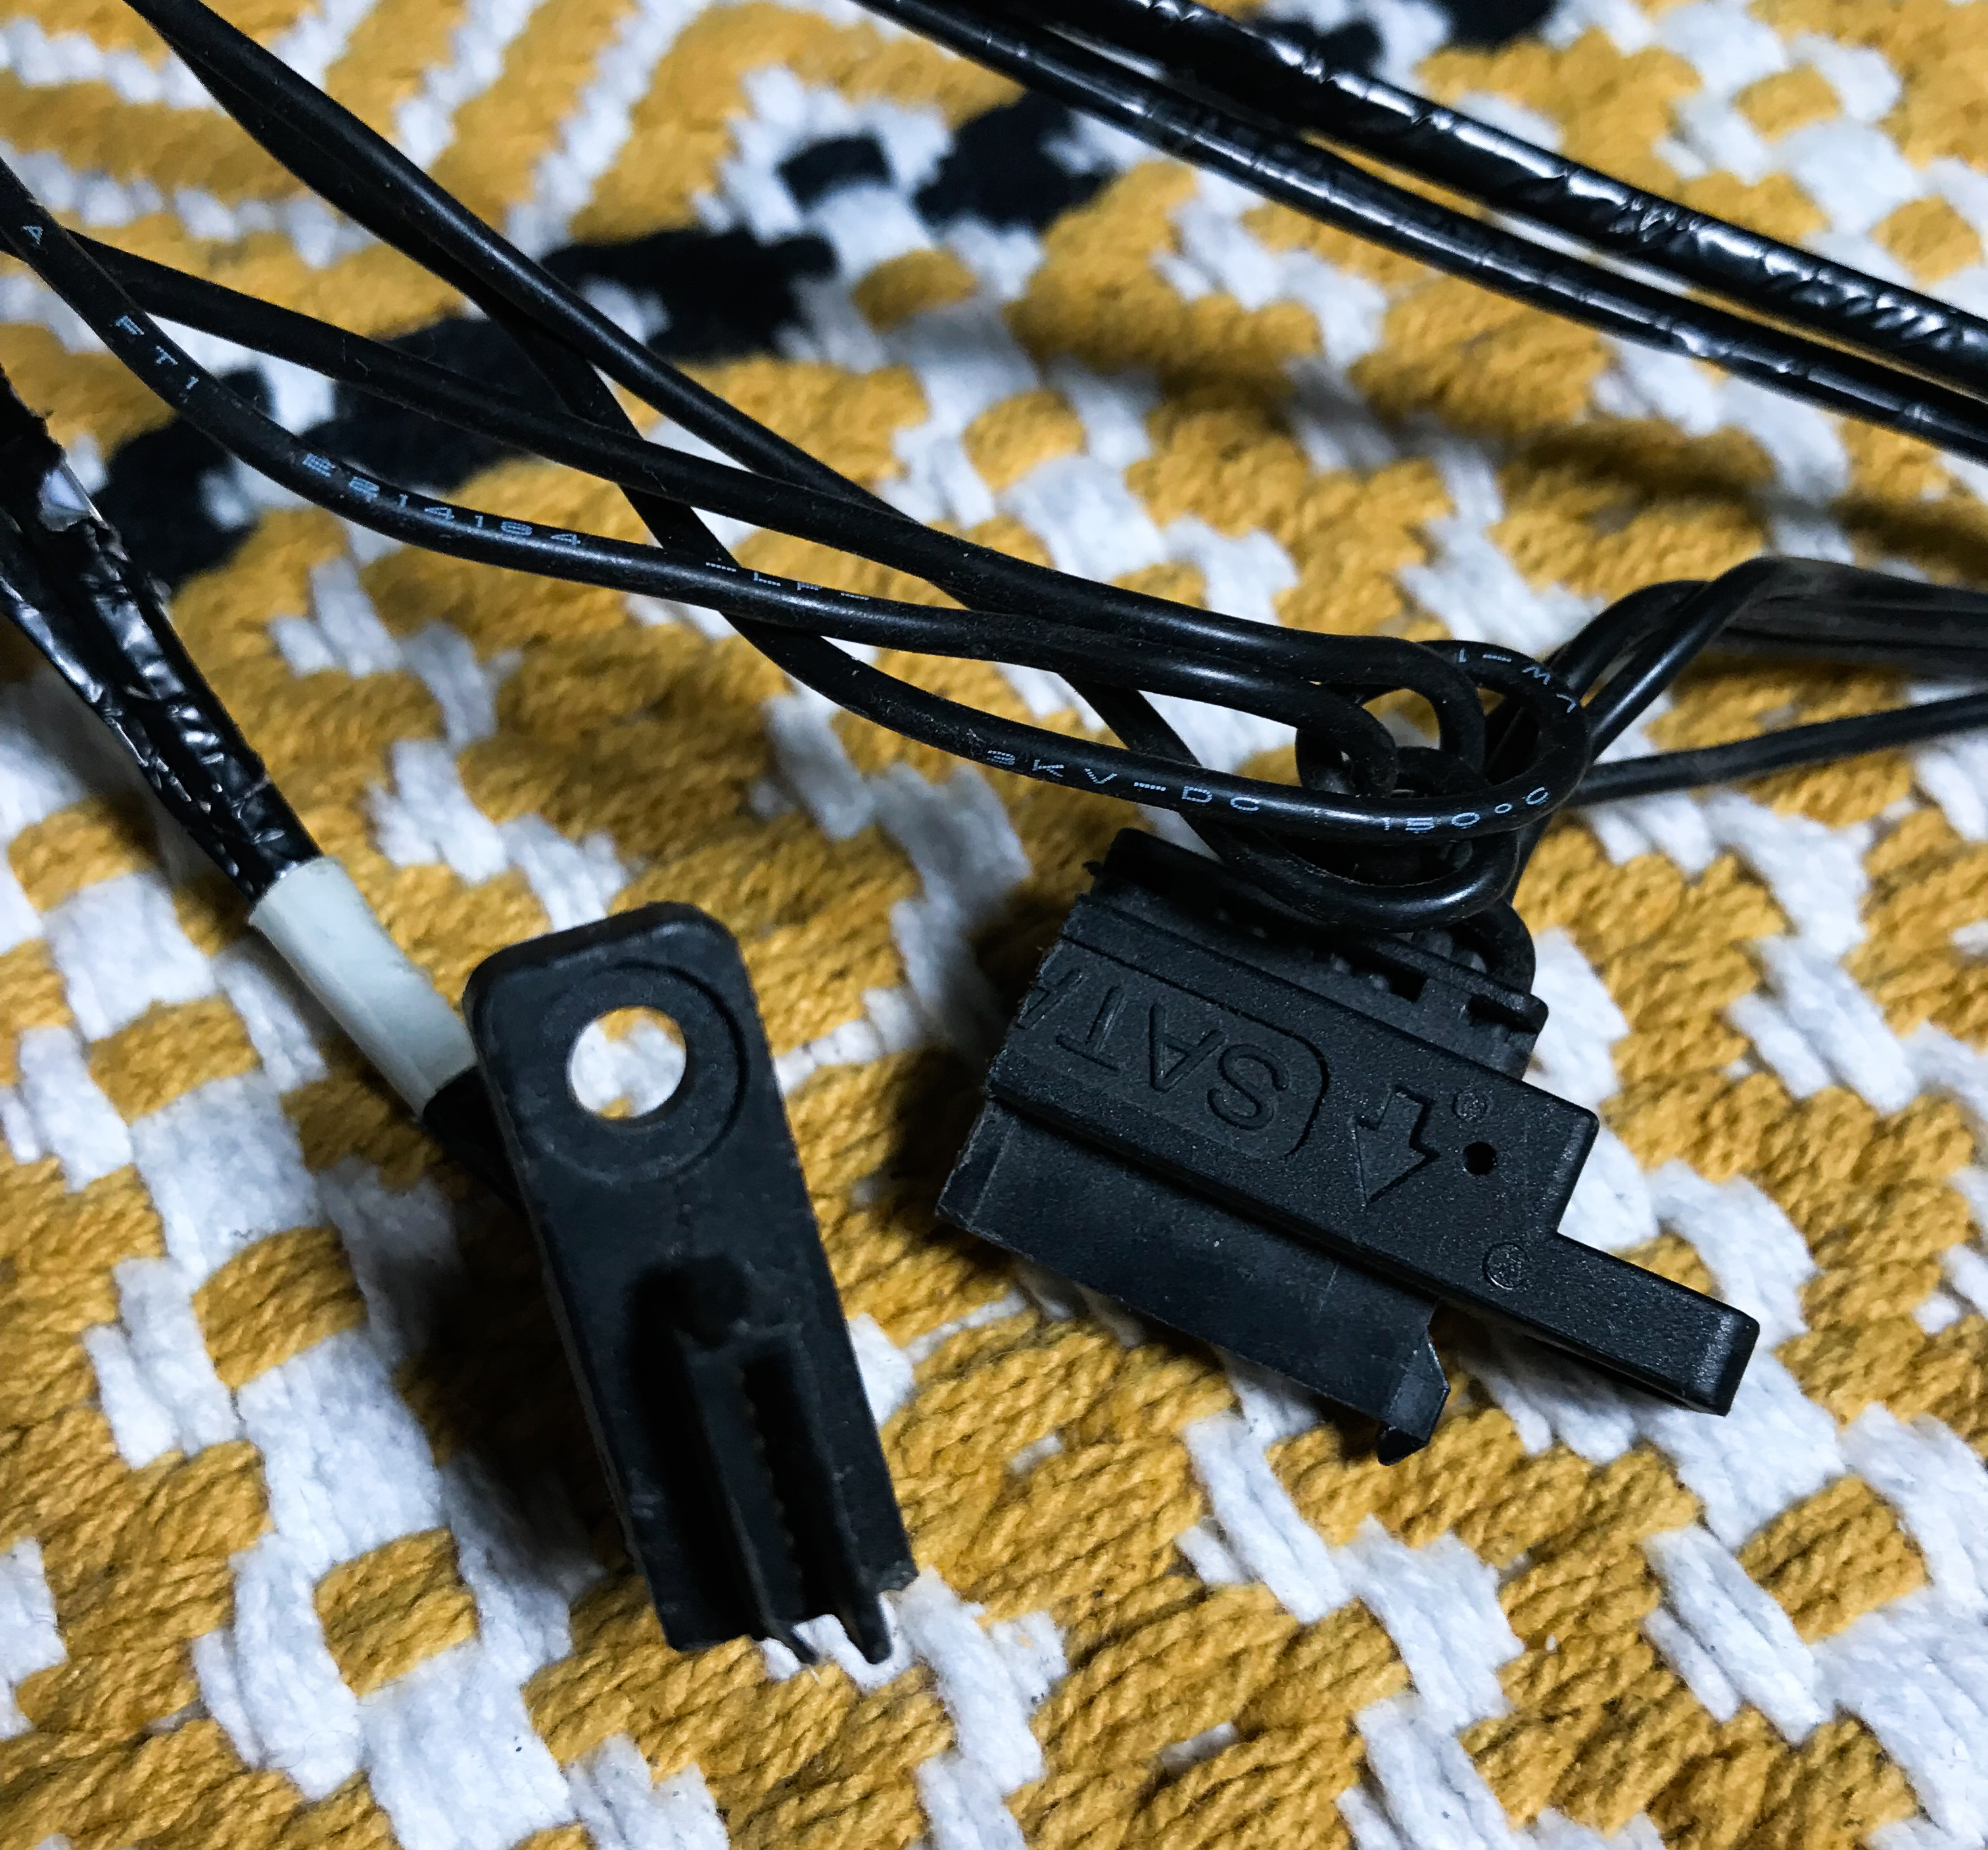
First item on the shopping list, a new loom, thankfully after a quick scout on the web and eBay I found a brilliant company called The Bookyard who had a loom for roughly £10 + VAT (Mac Pro Hard Drive Connection Cable) they even provided free mounting screws. However the knackered loom would not stop me from progressing just limit my options until a new one was installed.
In the years in between the loom cutting and now I had purchased a couple of bay converters that would allow me to easily install a SSD, I had a OCZ Trion 100 240GB drive sitting in an external caddy not being used so I repurposed this for the Mac Pro (it is not a great SSD and there are far better for modern computers but as the Mac Pro only has SATAII it would be perfectly suitable). With the drive fitted it was time to power up and do a clean install from a DVD.
The second boot was not quite as successful as the first, I was greated by the Mac chime, followed by no video and then grinding noises.
Troubleshooting these one by one I started with the grinding noises, this was caused by me trying to open the SuperDrive and it fowling on the case, in my view this was not that bad and likely could be solved by further cleaning or adjusting where the drive sits. For now I ignored this fault and moved on to the second issue no video.
This was actually a problem of my own making, the original graphics card in the Mac had long ago been replaced with a non Mac EFI Nvidia card that (again thanks Apple for being difficult) wont present any display until the graphical subsystem is initialized (so no hold option for boot choices etc). This presented some reasonably serious problems, whilst video may work in recovery mode on El Capitan (this may not work at all if it only currently works with custom Nvidia drivers) it’s certainly never going to work booting an install disc that originally came with the Mac.
At this stage I scratched the idea of doing a clean install from a DVD and attempted to get video output by blind booting into the currently installed El Capitan recovery mode. To achieve this I had to remove the SSD and reinstall the original hard drive, with this done and a blind boot using the recovery shortcuts (Command + Option + R) I was left with an excruciating wait but eventually recovery mode appeared. This was quite a relief as all progress would have had to stop until I had sourced a suitable video card had this not worked.
The SSD was refitted in the only other working bay and I restarted the recovery boot, after some faffing and erasing in disk utility I was able to begin the install of El Capitan onto the SSD. With this complete the original drive was removed and the SSD installed into bay one, powering back on it booted exceptionally quickly. This was excellent news and indicated that the issue had most likely been with the old drive being on its last legs, I suspect there were also configuration issues but hopefully not any underlying SATA problems.
Next item for the shopping list, was a recent-ish PCIe Mac EFI graphics card, it would be best if I could source one of these (even if it was not fitted unless rebuilding) as it would make booting / recovery easier. After some looking in the usual places, I came to the conclusion that they were a bit too expensive for the purpose of just having access to boot options, and given that blind booting works I could hold out on this for now.
Rebuilding my 2008 Mac Pro – DDR2 FB-DIMMS Are cheap now
Back when I first got the Mac, memory was very expensive as it was Fully Buffered, however in the proceeding 10 years this ram has become inexpensive. A quick search and £22 later I had 24 gigs of it on the way to me in matched 4 gig sticks, removing the original 2×1 gig sticks and leaving the aftermarket 2×4 gig ones will result in a healthy 28 gig of ram. Not bad for a 10 year old computer. Whilst I waited for the ram, I took the opportunity to work on the SuperDrive.

Rebuilding my 2008 Mac Pro – Ding Dong The Drive Is Dead
After dismantling the Mac, removing the front fan assembly and poping out the optical drive caddy it was clear that there was still vast quantities of built up dust and crap everywhere. I spent a good hour cleaning all of this with air dusters, cloths and cleaning fluid, and it did not surprise me at all that the SuperDrive had failed to open, the drop down doors on the case were totally caked in dust and very hard to move.
After freeing and cleaning the drive doors and a quick temporary reassembly the SuperDrive was now opening without fowling and no longer making grinding noises. However all was not well, any disc that was inserted failed to read and resulted in the familiar noises of a dead or dying optical drive. The result of years of dust and under use of the drive had killed it, it would need to be replaced.
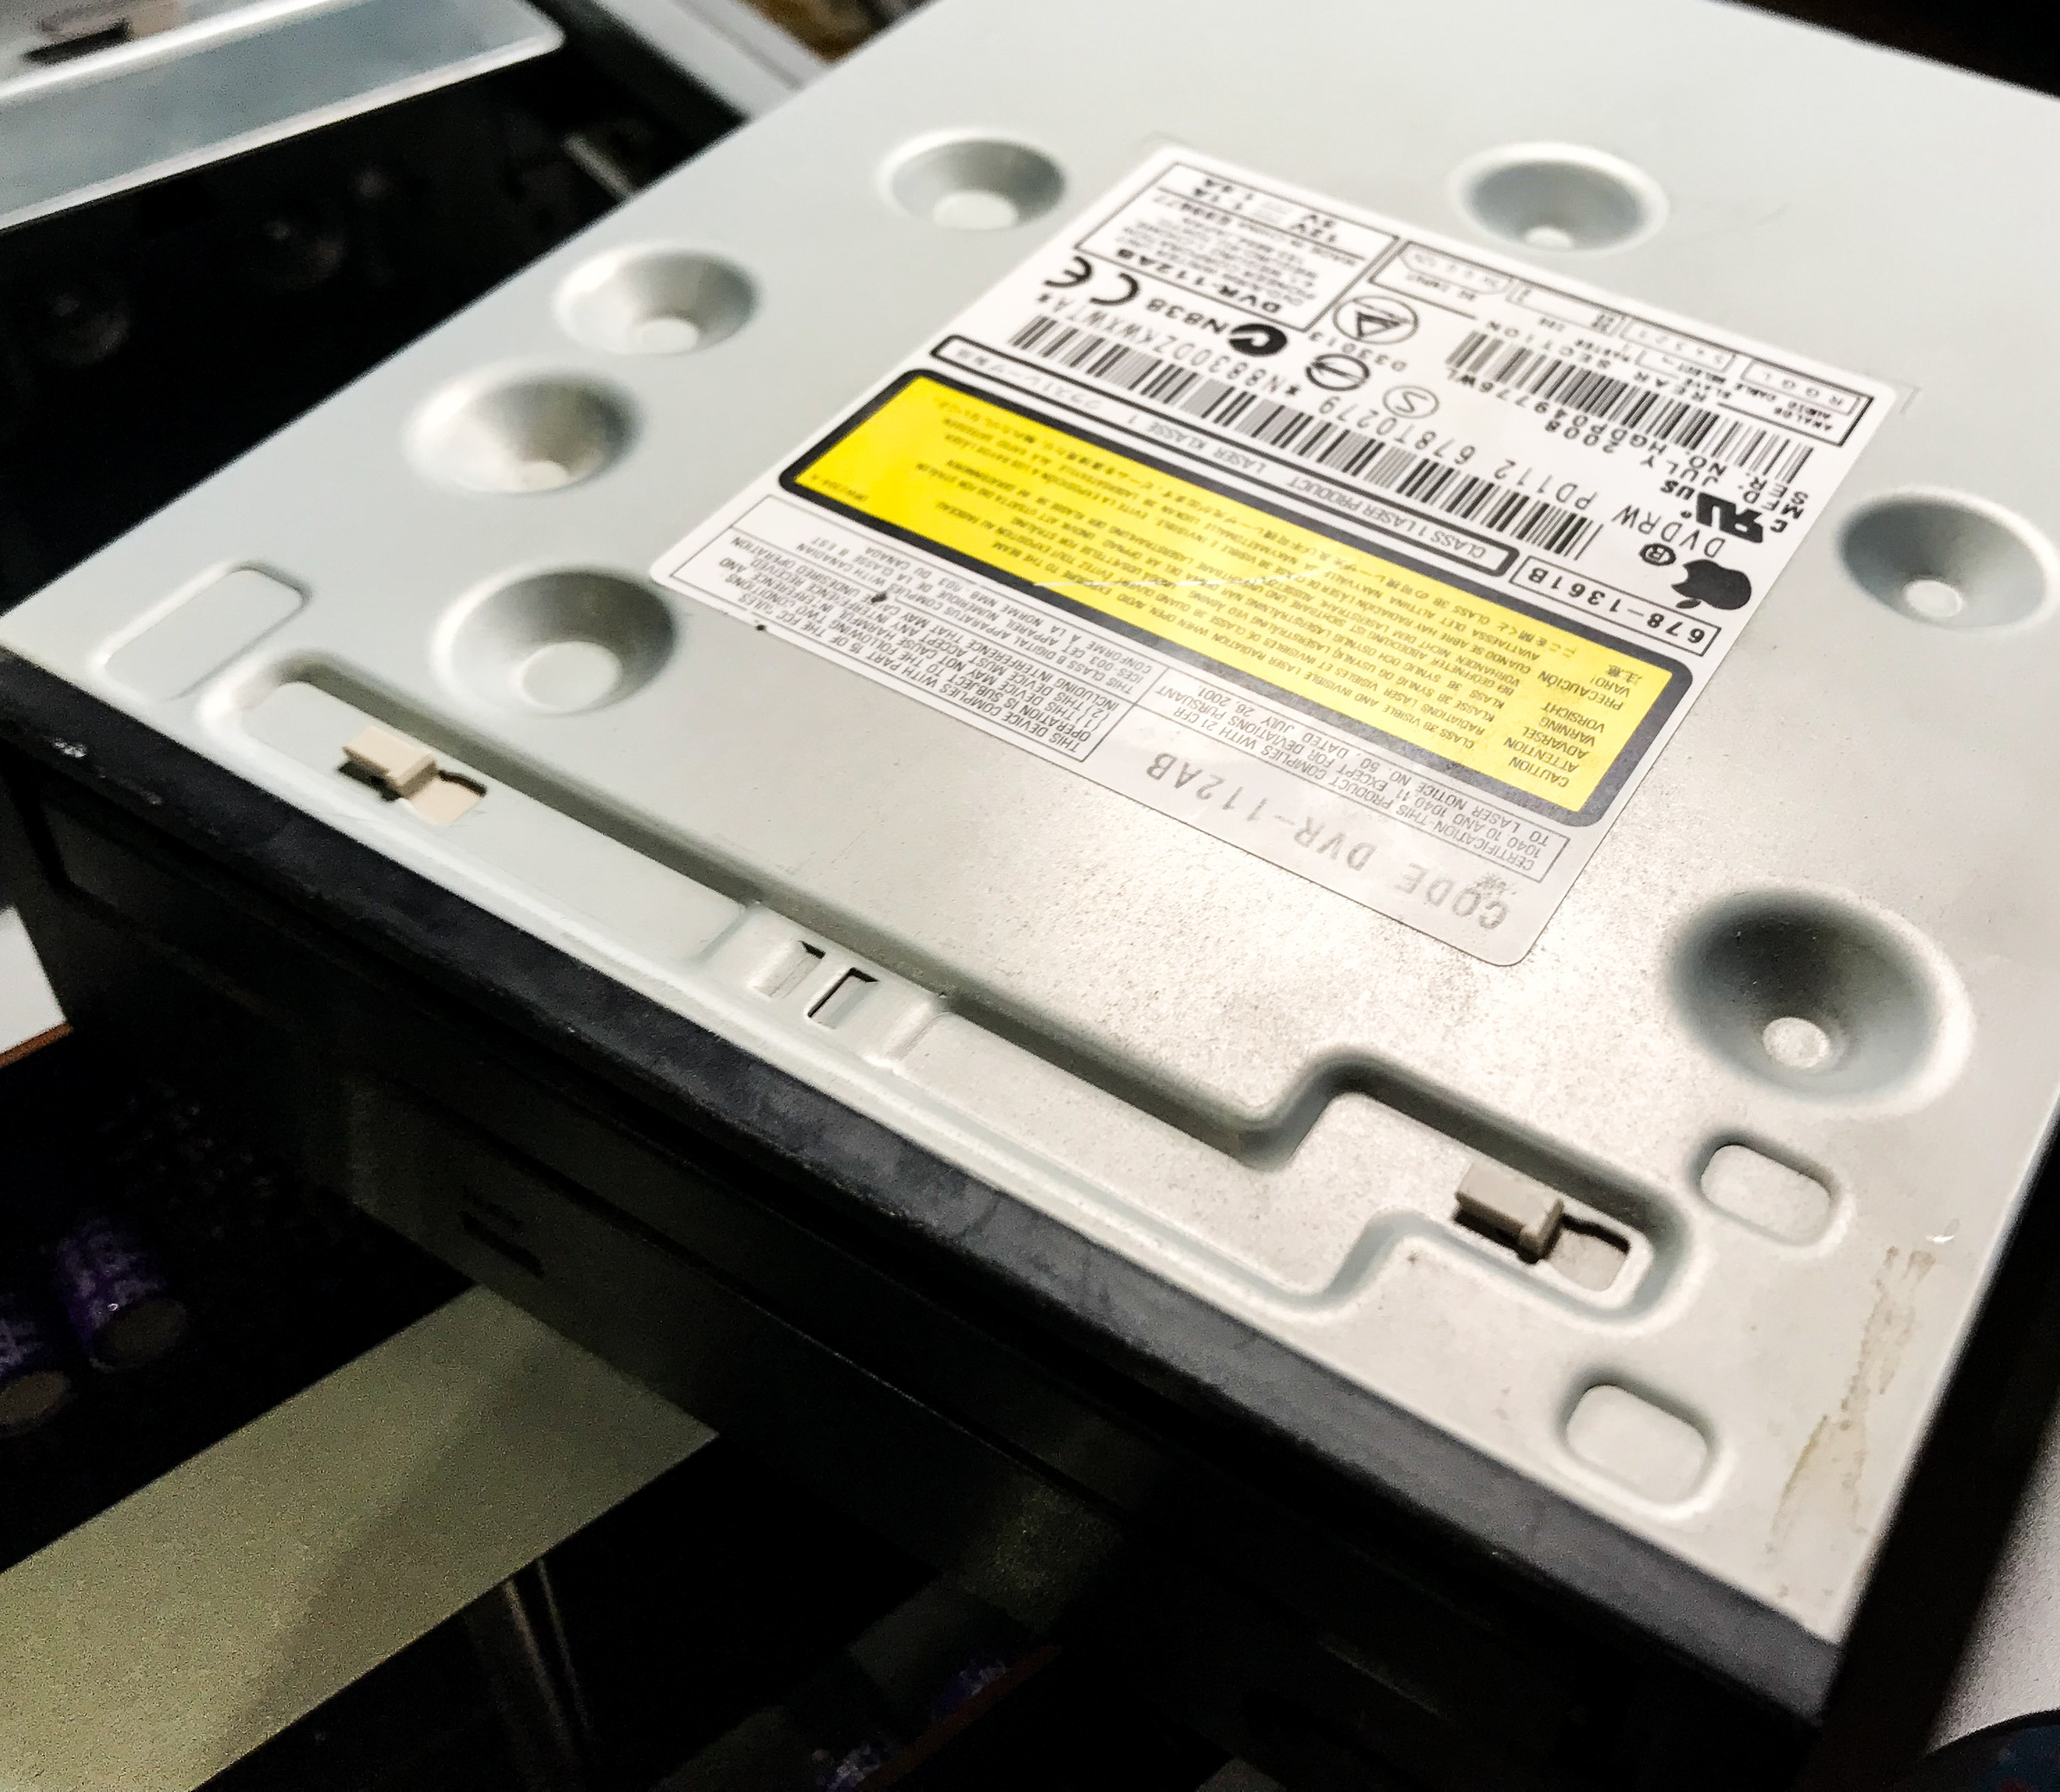
The original Mac Pro 2008 SuperDrive is IDE, which is somewhat of a pain, on all subsequent models of the Mac Pro they moved to SATA (why they stuck with IDE on the 2008 is anyone’s guess as all the HDDs were SATA). On a quick trawl of eBay I located a second hand 2009 drive (SATA) with the full caddy for £10, a great purchase as the caddy is worth the £10 on its own.
Now the 2008 Mac does have a trick up its sleeve, under the front fan assembly are two hidden SATA ports (even more reason to wonder why they did not use these), which are perfectly capable of running the optical drives, these have frequently been used to add eSATA ports to the back of the mac as shown in this video.
Usefully there is enough room under the first HDD bay to route cables up to the optical drive, however you will need extra long SATA cables (as I found out to my mistake) and you will require a power converter to transfer from molex to SATA power.
I ended up using the following combination of cables, there is certainly a more efficient way of doing this but I had not initially anticipated how long the SATA data cables needed to be so I had to order some extenders. 1 x Sabrent SSD / SATA Hard Drive Connection Kit (£4.73) and 2 x Valueline VLCP73125V05 0.50m SATA 7 Pin and 15 Pin Male to SATA 7 Pin + 15 Pin Female SATA 22 Pin Extension Cable (£4.99) for a total of £14.71.
This gave me the ability to fit two SATA optical drives should I need and it made sense that if I was going to the trouble to route one set of cables I may as well do both even if I don’t immediately use them. I secured the cables to the inside of the case with electrical tape so they would not catch on the caddy and cause issues if I needed to add or remove drives.
Whilst I waited for the caddy and drive to arrive from eBay I repurposed an underused LiteON iHAS DVD burner, removed its front bezel and fitted it in place of the defunct SuperDrive. All of the cabling worked perfectly and the Mac could now read and write CDs and DVDs. The new SuperDrive when it arrives will be fitted as a secondary optical drive (assuming it works) and I will change to the new caddy as the original is bent and slightly buckled from previous manhandling.
Rebuilding my 2008 Mac Pro – Loom Swap And Ram Upgrade
By this time both the new ram and the replacement SATA loom had arrived, along with two replacement blanking plates for the back of the Mac (unsure where they had got to but The Bookyard had them in stock so I had ordered them at the same time as the loom, they were a little pricey but worth it).
Once again out came the fan assembly and four screws later the loom was out, it was a far less complicated process than I expected and hats of to Apple for making this range of Macs (unlike modern ones) incredibly user serviceable. With the loom replaced all four bays were now functional and ready for use. The ram cards were removed, cleaned (again, how does one computer trap so much dust) and repopulated with the new ram, taking the total up to a very decent 28 gigs.
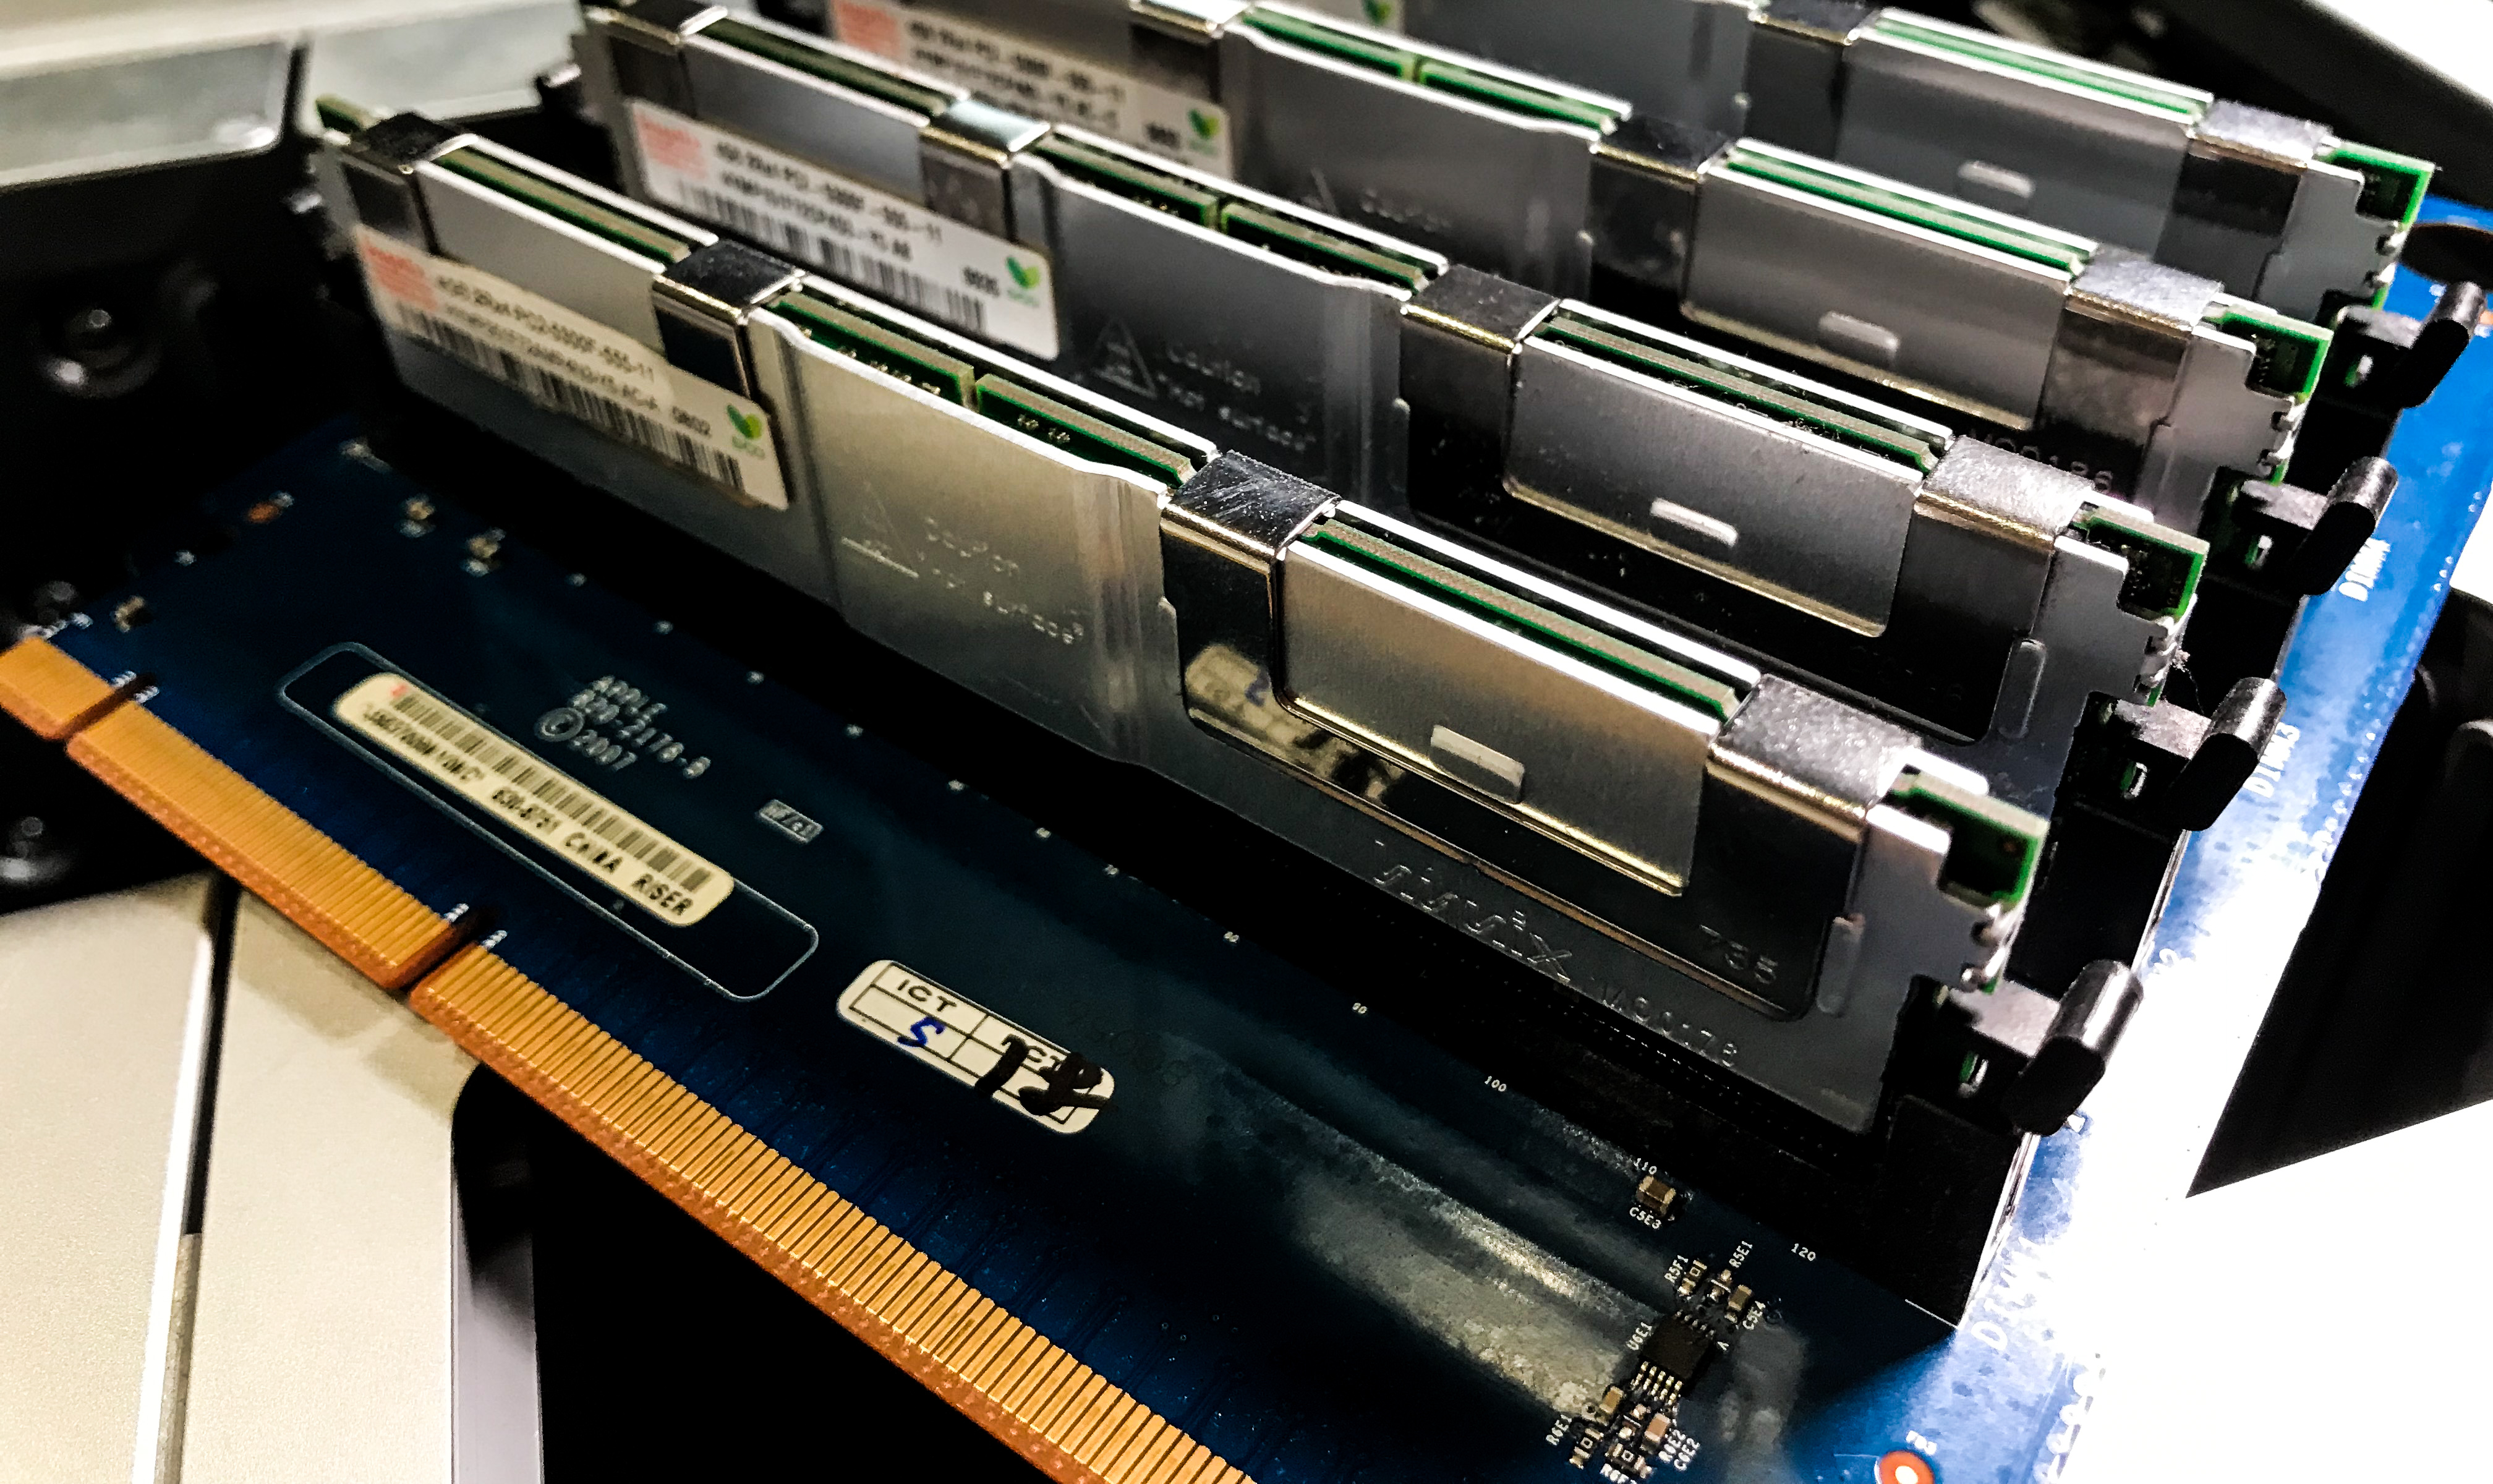
With the cards back in and the fan assembly refitted (hopefully for the last time) the Mac booted up and both the ram and optical drives were registering correctly.
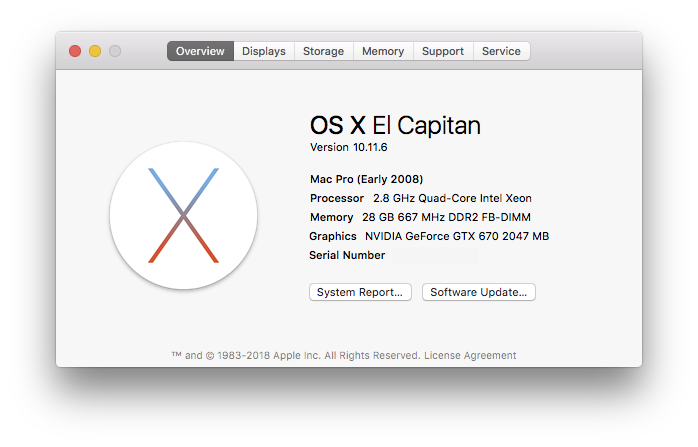

Other than a final clean and the later addition of an extra optical drive the Mac Pro was now rebuilt and complete, lets hope it lasts for another 10 years!
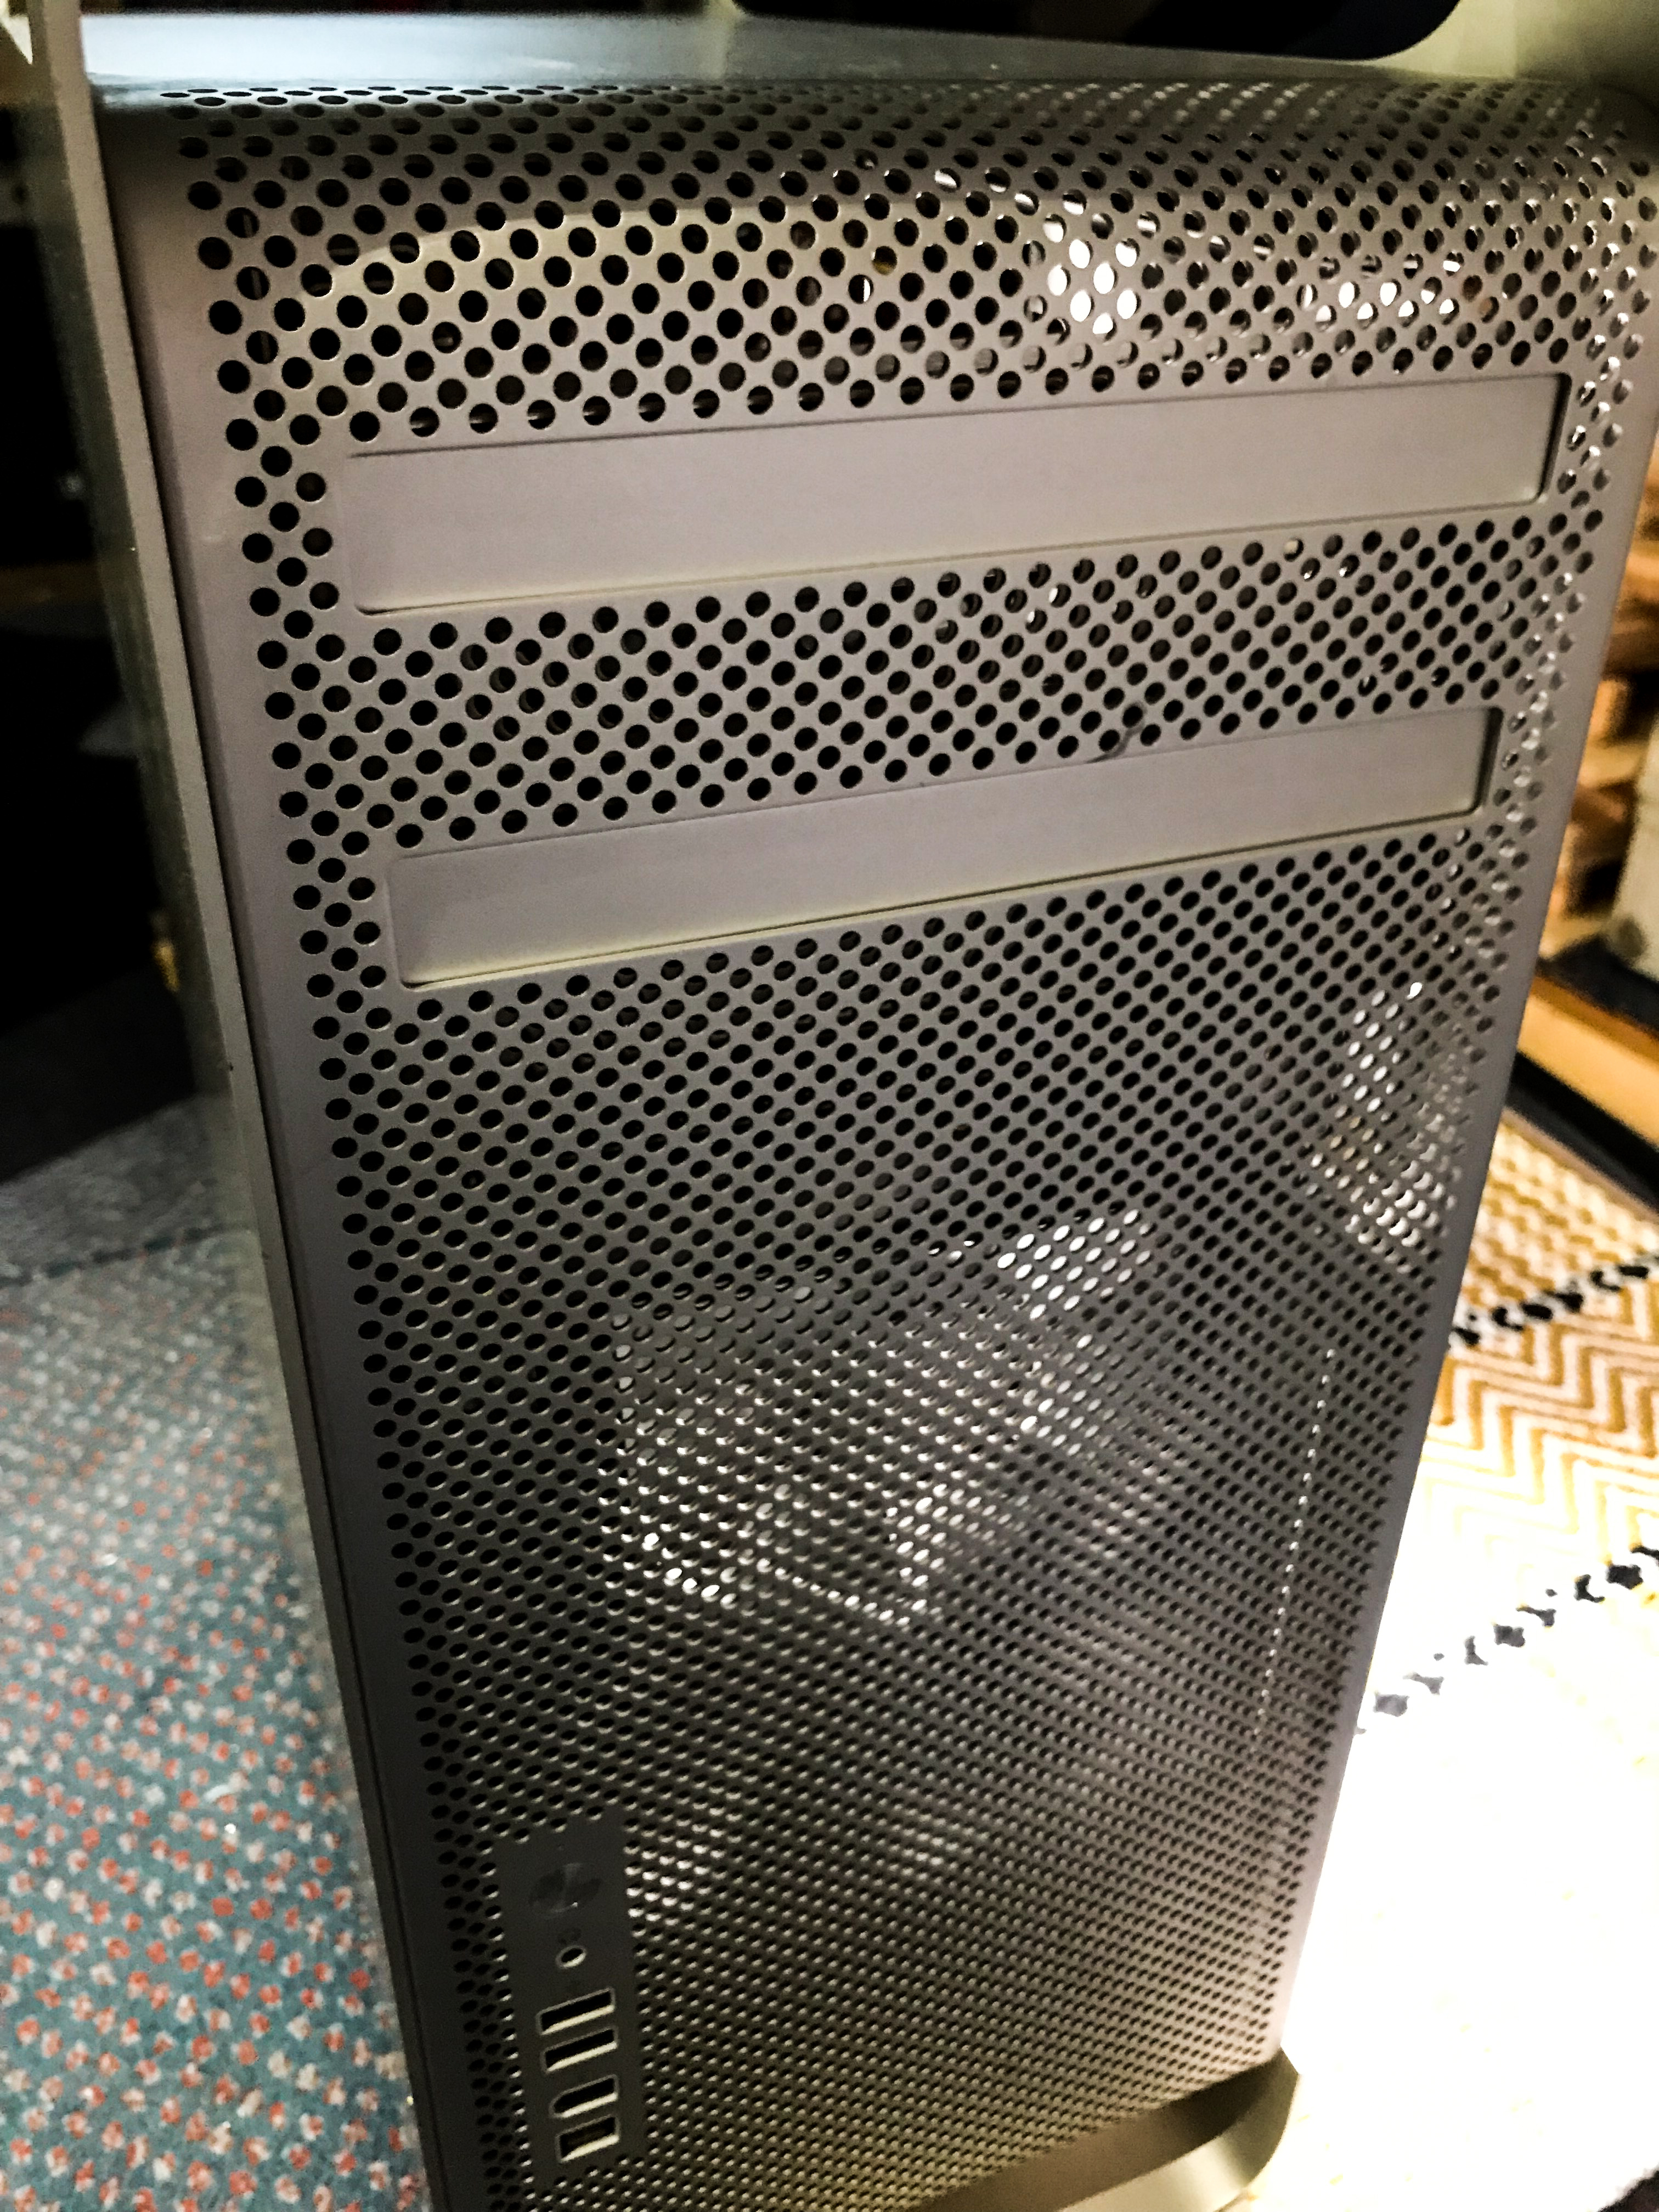
Rebuilding my 2008 Mac Pro – What Did It Cost?
Total spend was £71.36, which I think is quite reasonable based on what needed to be replaced. I am not taking into consideration the cost of the SSD, the caddy it went in or the DVD writer I had sitting around. If you needed to purchase all of these as well it would likely be more than double the cost of what I spent. Money could also have been saved if I had not been a complete idiot and cut through the SATA loom, or indeed if I had purchased less ram, I am not sure that I will see the immediate benefit of 28 gigs, but why not 🙂
Still it was a fun projected that has turned a forgotten and unusable workstation into something that I am now complimenting my setup with and I hope I will continue to use for some time to come.
I hope you enjoyed this article which was as much a trip up memory lane for my Mac ownership as it was a rebuild article.
